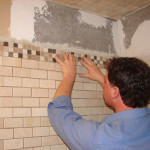
 Home improvements and redesigns are a popular task for homeowners across the valley for good reason. Updating your house will increase the visual appeal and may even drastically increase its sale value. Many people begin their home improvements in their kitchen, but bathrooms are another great place to start. Replacing your old shower or bathtub with a beautifully tiled shower is guaranteed to impress you and your guests.
Things to know before you start the project
- What you want the finished shower area to look like.
- The exact dimensions of the shower walls & floor so you know which size tiles to use.
- Find a reputable contractor to create the shower base / learn how to create one yourself.
- How to properly install a water barrier and mount cement board to shower area walls.
- How to cut tile.
- How to work with grout.
- How to properly seal the tile surfaces.
- Tile floors should be slightly angled toward the drain to allow thorough drainage.
- Tiled showers (especially floors) may require frequent cleaning to deter mold growth.
Before you start tiling, be sure to prepare the base and walls.
How to Tile a Shower Floor & Walls
You need to thoroughly clean the shower base and walls to create a clean bonding surface.
The Floor
- Lay the tiles on the base so you can see how they fit in the area. Make cuts as needed for a good fit (many businesses will make cuts for you if you don’t have the proper tools).
- Glue the tiles to the shower floor with tile adhesive while gently placing spacers between the tiles. Allow the adhesive to dry as stated on the product’s packaging.
- Remove the spacers and fill the spaces between tiles with thick grout. Gently wipe the grout off of the tile surfaces with a sponge.
- Allow 24 hours to dry.
The Walls
Start on the wall that is opposite of the shower entrance.
- Arrange the tiles along the bottom of the wall to figure out how they will need to be cut to fit if necessary.
- Spread mortar in patches with a trowel starting at the bottom of the wall while firmly pressing tiles into the adhesive. Make a point of placing spacers beneath and between the tiles as you go.
- Start a new wall when you finish after reaching the top of each wall.
- Remove the spacers and use grout the same way you did with the shower floor.
- Clean the tiles and let the grout dry for 24 hours.
Sealing the Tile Walls & Floor
- Thoroughly clean the tile and grout surfaces.
- Evenly coat the entire tile area with a clear water-sealing coat.
Talk to a sales representative at A Cut Above Glass for a custom-made glass door for your new, tiled shower.